I had to laugh at the title because although this dough and bread are a no-knead, my husband and I would argue that it is an absolute NEED! (see what I did there?)
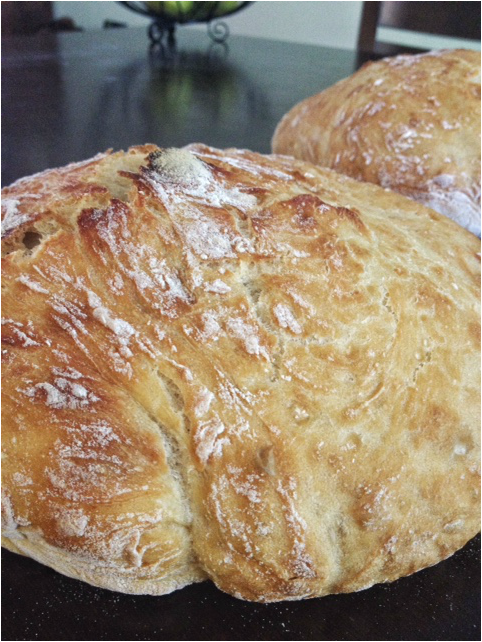
But really, my husband has fallen in love with this bread and actually prefers it to my swirl bread, but since its applications are different than the swirl bread, I still make both (when I find the time, yikes!). This bread, is a dream to make and a complete sensory experience to eat - yup, it's got it all! The smell is bound to make you sing hallelujah choruses, the sight is bound to make you feel like an accomplished baker from the south of France, the feel will bring you the joys of crust and chewy, the sound of it will make you reflect on how one food could have all the joys of a delightful texture and still give the glorious sounds akin to satisfaction of potato chips (admit it, there is something satisfying about crunching away on those little buggers!), but the taste, ah, the taste - no words.
Want to look like a complete connoisseur of breads? Make this bread and you won't even feel like you're pretending! AND it has the added benefit of no-knead and no-fail. I actually have yet to fail at making this bread as It has worked out perfectly EVERY. SINGLE. TIME. You can do it, I promise.
Before I get into the instructions I am going to tell you about some equipment that make making this bread easy, and wonderful. **Please note that no sponsoring of any kind went in to the writing of this post** (I'm so not cool enough to have that kind of recommendation).
 I had sticky hands and was way to involved in the dough-making/forming process to clean it off. So you can see it in its full, bread-making glory!
 The Pot
I am not fancy or rich enough to own one of those fancy (and beautiful) Le Creuset Dutch ovens so I am here to say that you don't need one of those to make this bread. BUT I am saying that you DO need a HEAVY pot with an oven-safe lid. I have this awesome stone-ware pot (5 quarts-ish) that used to belong to my great-aunt (a cooking/baking/catering legend in Raymond, Alberta, Canada) which I inherited when I started college and this ancient piece of cookery has proven itself again and again as to why I don't need to drop the cash on one of those fancier Le Creuset Dutch Ovens. If you aren't fortunate to have a bequeathing great aunt or a heavy pot on hand already, I have a couple of suggestions:
1. If you have a dutch oven - like the traditional, camping, heavy, black dutch ovens, use that! I've used one (with success) to make this bread so it can be done.
2. Another option would be to use the ceramic insert of your crockpot. NOTE: I have not tried this BUT I've heard it works. Before you try it, research your crockpot insert and make sure it is oven safe and that the lid is oven safe (no plastic handles please). The bread is baked at 450oF so hot, hot, hot temperatures!
3. If all else fails, head over to your local thrift store (Goodwill, etc.) and see if you can find a heavy duty pot there because the pot I use looks like it belongs in a second-hand store and it is my favorite pot!
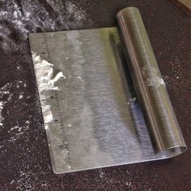
The Bench Scrapper
This tool is one of my most-used kitchen tools. Period. I use it for most everything dough related and it is a life saver for this dough because even though this dough is no-knead, you still have to handle it a bit and, boy, is it sticky! There's no particular brand that I have found to be better than another and I don't even know where the one I own was purchased because it was a wedding gift and it is invaluable to me! Purchase one, it will change your life, at least in the kitchen, for less than $10.
I am not fancy or rich enough to own one of those fancy (and beautiful) Le Creuset Dutch ovens so I am here to say that you don't need one of those to make this bread. BUT I am saying that you DO need a HEAVY pot with an oven-safe lid. I have this awesome stone-ware pot (5 quarts-ish) that used to belong to my great-aunt (a cooking/baking/catering legend in Raymond, Alberta, Canada) which I inherited when I started college and this ancient piece of cookery has proven itself again and again as to why I don't need to drop the cash on one of those fancier Le Creuset Dutch Ovens. If you aren't fortunate to have a bequeathing great aunt or a heavy pot on hand already, I have a couple of suggestions:
1. If you have a dutch oven - like the traditional, camping, heavy, black dutch ovens, use that! I've used one (with success) to make this bread so it can be done.
2. Another option would be to use the ceramic insert of your crockpot. NOTE: I have not tried this BUT I've heard it works. Before you try it, research your crockpot insert and make sure it is oven safe and that the lid is oven safe (no plastic handles please). The bread is baked at 450oF so hot, hot, hot temperatures!
3. If all else fails, head over to your local thrift store (Goodwill, etc.) and see if you can find a heavy duty pot there because the pot I use looks like it belongs in a second-hand store and it is my favorite pot!
The Bench Scrapper
This tool is one of my most-used kitchen tools. Period. I use it for most everything dough related and it is a life saver for this dough because even though this dough is no-knead, you still have to handle it a bit and, boy, is it sticky! There's no particular brand that I have found to be better than another and I don't even know where the one I own was purchased because it was a wedding gift and it is invaluable to me! Purchase one, it will change your life, at least in the kitchen, for less than $10.
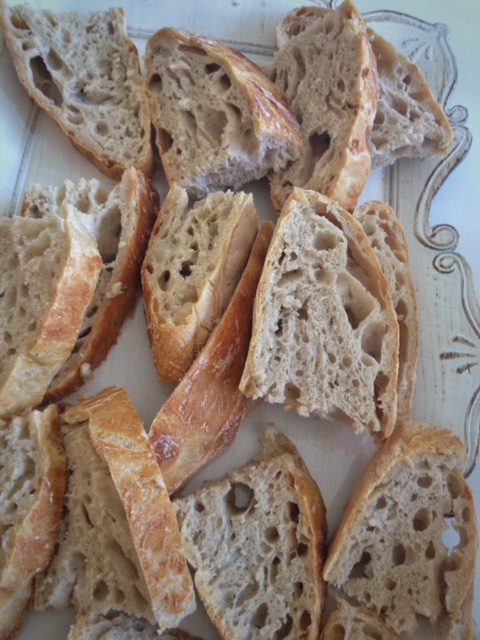
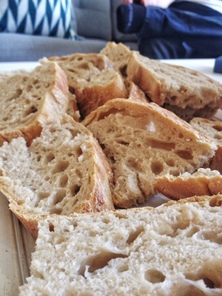
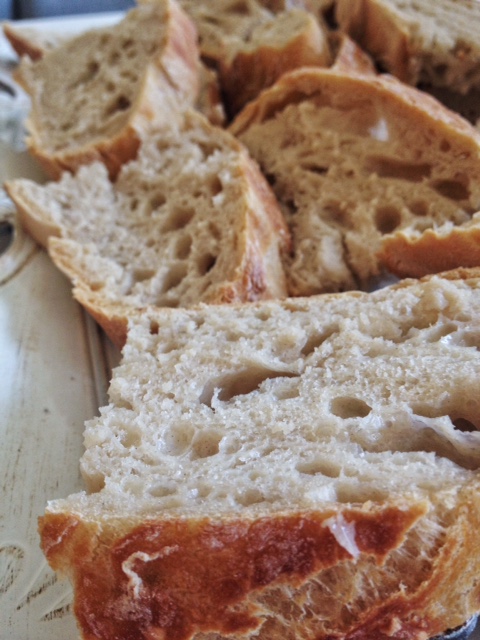
Look at those glorious holes! Those holes are produced by the yeast fermentation and are what give this bread its phenomenal texture!
Can I just give a quick lesson in bread before I give you the actual recipe? I just love the science behind this! If you'll notice in the recipe below, it only calls for: flour, water, salt, and yeast. Believe it or not, but these are the ONLY ingredients necessary to make bread - as in bread of any kind! There is enough sugar in the flour (in the form of starch) to feed the yeast. When we make "regular" bread, and add things like sugar, oil, and eggs, they are simply for flavor and texture. So you ask, isn't salt for taste? Well, yes.....but it has another role too! Salt controls the yeast feast/fermentation! The salt molecules interact with some of the water, thereby, interfering with the full yeast feasting capacity. The yeast utilizes the water to metabolize the starches/sugar and so the salt slows and controls that process so that the dough doesn't get too fermented, which, for this recipe is super important. If you notice, the ratio of ingredients for this bread are quite a bit different. To show:
| "Regular" Bread
| Crusty Bread
|
The ratios may not seem that different, but on that scale, that 1/2 t difference in yeast, 1/2 c water, etc. make bit of difference. The crusty bread takes 12-18 hours to fully "rise" (really, more ferment) and so more the same amount of flour, we are adding more yeast to give more fermentation which = more digestion by yeast which = more gas production which = more bubbles which = dreamy texture and varied crumb. Because of that extra yeast, we add more water (to better metabolize) and more salt so as to "control" (at least a bit) the yeast.
There, I got to be a bit nerdy. Now you know! My favorite way to do this bread is to whip of the dough before I go to bed (it takes 5 min, tops) and then bake it in the morning, OR whip it up before work and then bake it that evening. Also, this bread makes the best morning toast. You think it's good as is? Put a couple pieces in the toaster and slather with butter....mmmmm, salivation has commenced.
Below I included some pictures of what the dough looks like at the different stages leading up to the actual baking of the bread because the dough looks weird and I don't want you too feel like you've messed up when you probably haven't.
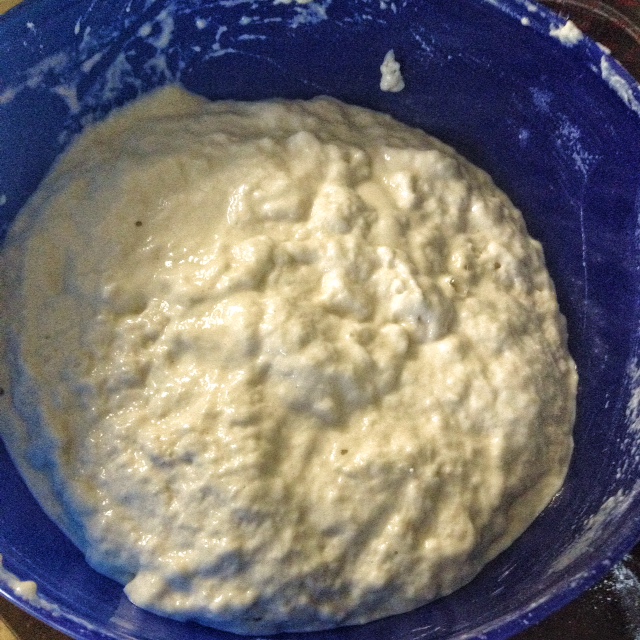 This is what the dough looks like pre-rise. It is WET! You will probably be worried that it is too wet, don't be. It will all work out, I PROMISE. In fact, it have found it to work out better being wetter vs. drier. 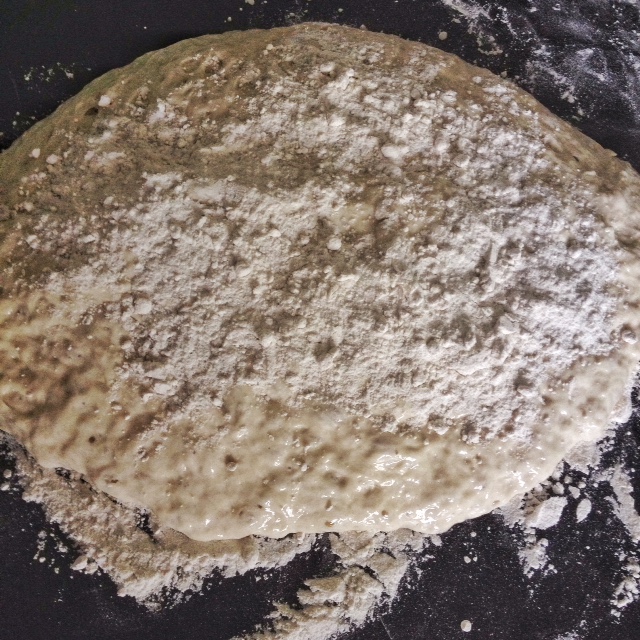 Now you add more flour! I probably sprinkle another 1/8-1/6 c of flour on top of the dough. Again, this is so the dough is somewhat manageable but don't put so mch that it dries out! | 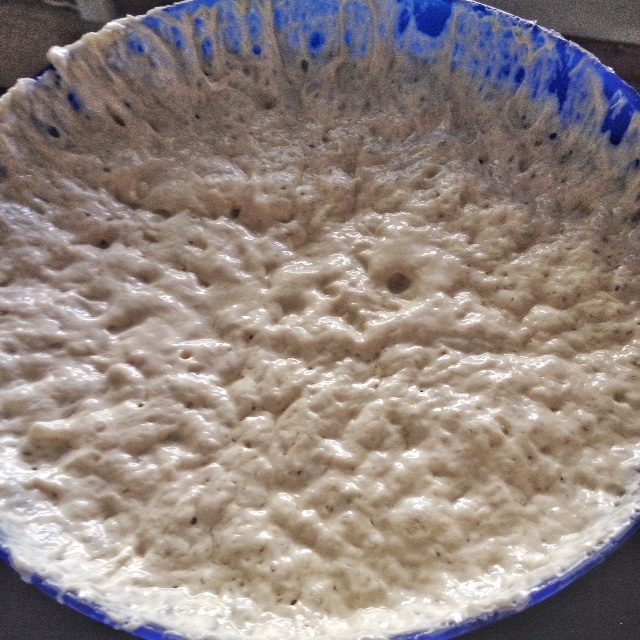 Here is the fermented, yummy, mess, approximately 13 hours post mixing of the dough. You will notice it looks like it was trying to escape. It didn't but if you're worried, use a larger bowl. 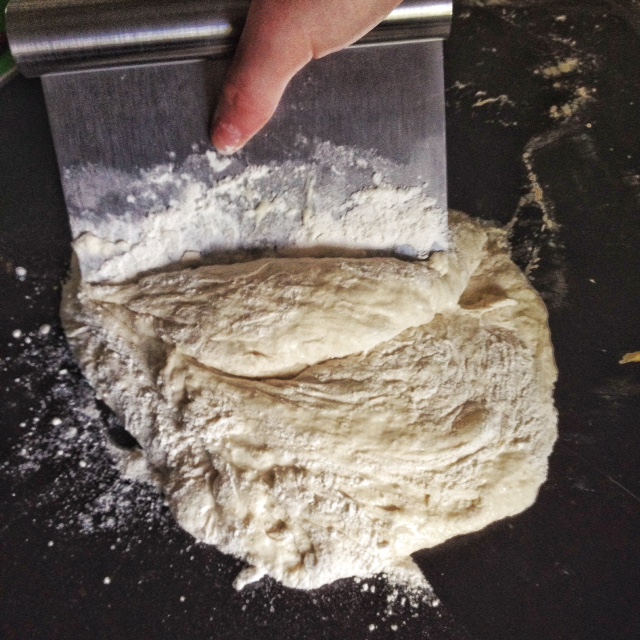 Notice the bench scrapper? What I am doing is lifting up the edge of the dough and folding it into itself. Just mixing the flour we just added. You don't want to do more than 7 turns/or folds though. | 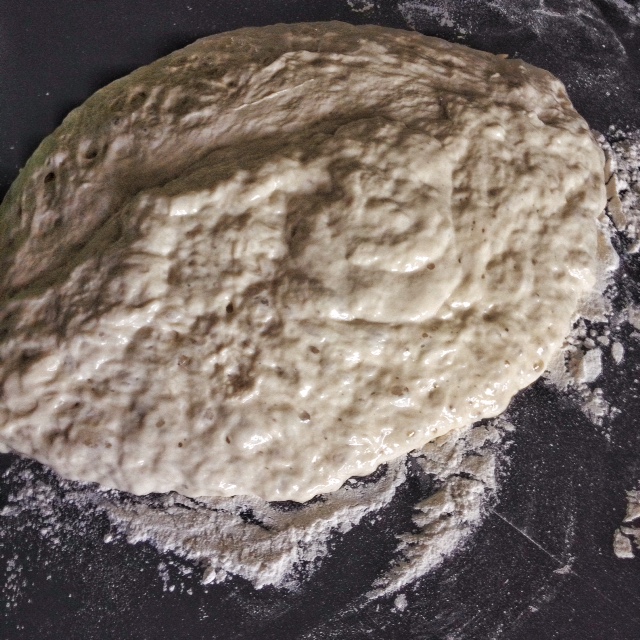 The mess has been dumped! If you notice, there is quite a bit of flour under it, this will make your life much easier. I probably put about 1/8 of a cup on the table so that it ends up beneath the dough.  After the folding, flour your hands (generously) and shape the dough into a loaf/roundish shape. Then cover it with cling wrap and let it sit for about 30 min. See below for the rest of the instructions. |
No-Knead Crusty Bread
Yields: 1 hefty loaf Time: 5 min mix, 12-18 hours rise, 1 1/2 hour bake time
Ingredients
3 c All purpose flour (+ more for loaf formation)
1 1/2 t yeast
1 3/4 t salt
1 1/2 c water + 1/4 c water (to be added later)
Instructions
Yields: 1 hefty loaf Time: 5 min mix, 12-18 hours rise, 1 1/2 hour bake time
Ingredients
3 c All purpose flour (+ more for loaf formation)
1 1/2 t yeast
1 3/4 t salt
1 1/2 c water + 1/4 c water (to be added later)
Instructions
- In a medium sized mixing bowl, add the flour, yeast and salt. Mix with a whisk/fork until combined.
- Add 11/2 c warm water and mix with a spoon. You will probably notice some dry/flour-y areas after you've mixed for a bit. Add the additional 1/4 c of warm water at this point. (For some reason, adding the water in two increments makes it easier to completely combine). The dough, at this point will look like a wet, mushy mess. Cover the bowl with cling wrap and a towel and put in a safe, warm place. Let it rest for 12-18 hours.
- After 12 hours (or more), remove wrappings from bowl. It will be bubbly and stringy looking. To a hard surface, add 1/8 c flour and spread it about. Then, using a spatula/scrapper, remove dough from bowl, onto the flour-y surface.
- Preheat oven to 450oF and add heavy-bottomed pot (with lid) to oven while it is pre-heating. Once oven is pre-heated, you will need to let the pot sit in the hot oven for an additional 15 min. (Note: if you're worried about your dough sticking, feel free to give it a quick grease, but mine has never stuck, due to the high heat).
- Add an additional 1/8-1/6c flour to the surface of the dough. If using your hands, flour your hands thoroughly then, using hands/bench scrapper, roughly fold the dough into itself to mix in added flour. If you find it to be unmanageable, add more flour in tablespoon amounts until you feel comfortable. Fold/mix the dough no more than 10 times so as not to make it tough or destroy your air bubbles.
- Once mixed, roughly shape the dough into a circular loaf. Loosely cover with cling wrap and let the dough rest for about 20 min.
- Remove pot from oven and remove lid. Heavily flour hands and then quickly transfer loaf/dough into the hot pan and promptly return the pot to the oven with the lid ON. Cook the bread for 25 min with the lid on. Remove lid and cook for an additional 10-15 min, until the top of the loaf is brown and crispy in places.
- Remove pot from oven. You may directly remove loaf to a cooking rack or you can let bread sit in the cooling pot and then transfer loaf to a cooling rack to finish cooling.
- Store the loaf in a DRY, closed place* for about a week.
*Quick rant on storing bread in refrigerator. DO NOT DO IT! If you are afraid of mold, freeze your bread, but never, ever put bread in the refrigerator because this is the surest way to dry your bread out and the refrigerator does very little to prevent mold from growing. The two best ways to store bread are:
1. In an air tight container at air temperature
OR.
2. in a freezer bag in the freezer.
1. In an air tight container at air temperature
OR.
2. in a freezer bag in the freezer.

 RSS Feed